

Windows is one of the most iconic operating systems to ever exist and has been implemented and rolled out on more computers than any other desktop operating system. Most of us are overly familiar with its features, manufacturer, and colossal drawbacks like the Blue Screen of Death. Despite the popularity of Windows, it’s certainly not without its flaws.
For instance, Windows 10 is notoriously insecure and invades the privacy of its users by default. Unless you change a myriad of default settings, Windows will harvest a lot of personal information and fling it back at Microsoft servers for storage, analysis, and archiving. But privacy issues in Windows 10 are only one small drop in a very large and flawed bucket.
Windows Defender is, perhaps, one of the most easily noticeable Achilles Heals of the Windows operating system, though most people don’t know that it can be shut down.
For those of you who used to play video games as children, Windows Defender is about as annoying as Navi incessantly screaming, “Hey!”
Problems with Windows Defender
Windows Defender was Microsoft’s answer to the growing threat of malware, spyware, and other similar threats. As you may well know, Windows is one of the least secure operating systems in the world, due in part to the fact that it’s so darn popular.
Think about things from the perspective of a hacker. If you’re going to spend hundreds of hours writing code designed to attack an operating system, wouldn’t it make sense to cast as wide a net as possible, especially if you’re trying to create a self-propagating virus or worm?
Though other systems, like Linux and Mac OSX, are susceptible to viruses, Windows is much more susceptible. So, it only made sense to start shipping Microsoft operating systems with a tool designed to provide some level of protection against these threats. Enter Windows Defender. Though it may sound like a brilliant idea, I’m not sure that Microsoft really executed their plan perfectly.
The ugly truth is that there are a lot of problems with Windows Defender, and it can easily interfere with a variety of applications. Furthermore, there are a lot of bugs that prevent it from even starting or running correctly. Windows Defender was originally created for Windows XP and is included in later versions up to and including Windows 7.
However, on Windows 8 and later versions, Windows Defender was essentially packaged together with Security Essentials, which is a more comprehensive antivirus and spyware protection system.
However, it should come as no surprise that Microsoft software written for Windows isn’t always the ‘cream of the crop,” so to speak. There are a smattering of third-party antivirus and security tools that work one heck of a lot better than Windows Defender, and running a third-party antivirus solution alongside Defender can cause conflicts, system problems, and false positives.
If you use a third-party solution like Norton (among others), I’d recommend disabling Defender.

Free Security Software Trials
It’s also worth noting that most new PCs come with free trial software from providers like Trend Micro, Norton, McAfee, and others. Due to the inherent conflicts encountered when running multiple versions of security software simultaneously, Microsoft included a way to disable Defender.
That said, note that Windows Defender does not automatically re-enable if you fail to opt for a third-party antivirus solution after it has already been disabled, which is a massive threat.
Typically, I recommend that you run at least a free version of antivirus software. If you don’t want to, then use Windows Defender at the very least. The failure to protect your system from malware could have some nasty (and expensive) consequences.
So, remember that a free trial of third-party antivirus is better than nothing. But if you don’t use Norton, Avast, Avira, or another provider, then you’re better off having at least Windows Defender enabled.
Checking Whether or Not Windows Defender is Currently Running
There are two main ways to verify whether or not Windows Defender is currently running. The first option is to simply look at the Taskbar in the lower-right hand corner of your desktop. Usually – but not always – there will be an icon for Windows Defender. Sometimes, however, the icon won’t show up (for whatever reason), even though Windows Defender is still plugging away in the background.
If Windows Defender is not immediately visible in the Taskbar, you may have to click on the arrow to expand the list of icons indicating running services. Alternatively, you can use the Task Manager to verify if the Windows Defender process is currently running. To open the Task Manager, simply use the ctrl + alt + delete key combination, then click on the Task Manager.
In addition, you can search for the Task Manager in the Start menu. Once the Task Manager has been opened, click the third tab, which is labeled “Services.” Then, look for the service labeled “WinDefend.” You can sort the services by name into alphabetical order to find it easier.
In the fourth column, you’ll see the service’s current status. If it’s on, the status will be labeled “running.” If not, it will be labeled “Stopped.”
Disabling Windows Defender
The process to disable Windows Defender depends heavily on which version of Windows you are currently using. With each new Windows operating system, Microsoft likes to make minute tweaks and changing that put setting in different places. So, make sure you follow the correct guide for your version of Windows.
If you don’t know which version of Windows you are using, you can usually find a sticker on the outside of your laptop, desktop, or mobile device that indicates the operating system version. Alternatively, you can open a command prompt (just search for cmd from the start menu) and enter the following two commands to check your version info:
- ver
- systeminfo
The command prompt should spit out textual data that indicates which version of Windows you are currently running.
Windows 10
Use the following steps to disable Windows Defender in a Window’s 10 environments:
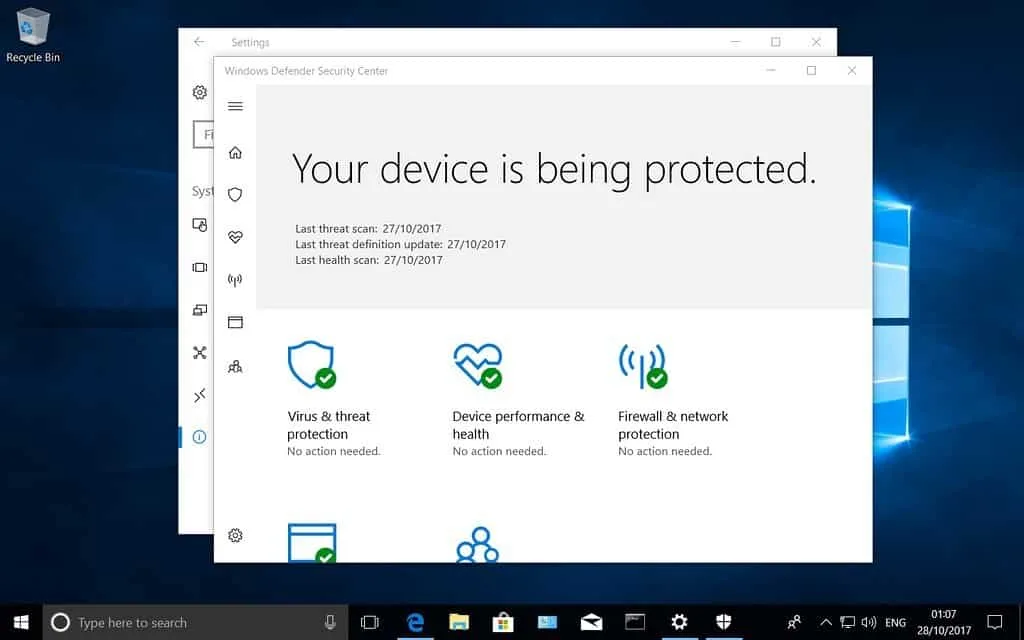
Step 1: Open Windows Defender. You can find it by opening the start menu and searching for “Windows Defender.”
Step 2: Click on the Settings link. It can be found in the upper-right-hand corner of the window next to a gear icon. Following the Settings link, it will open the Settings dialog.
Step 3: In the new window, look for the first option labeled “Real-time protection.” There is an on/off switch. Simply make sure that it is set to “off.”
Step 4: Optionally, you can disable other settings such as Cloud-Based Protection. However, the real-time protection is the setting that causes conflicts with other antivirus programs.
Windows 7 and Windows 8/8.1
It’s not possible to uninstall Windows Defender in Windows 7 and Windows 8/8.1 because it is a component of the operating system. However, you can use the following steps to disable it:
Step 1: Open Windows Defender by opening the Start menu and searching for “Windows Defender.”
Step 2: In the top-right corner of the Windows Defender pane, find the “Tools” option and click on it. It also has a gear icon to identify it.
Step 3: From the “Tools and Settings” pane, click on the first link. It is labeled “Options.”
Step 4: Once you have opened the “Options” window, click on the “Administrator” option in the left-hand pane.
Step 5: The first option under the “Administrator” panel is labeled “Use this program.” Simply make sure that you uncheck this checkbox. Next, there should be a pop-up window confirming that Windows Defender has been successfully shut off.
Step 6 (Optional): Optionally, you can manually configure the Windows Defender service to ensure that it is disabled for good. To do so, open up the Services menu from the Control Panel. Alternatively, you can open the Services menu by clicking on the Start menu and entering services.msc.
Step 7 (Optional): In the Services window, scroll down until you find the Windows Defender service. You can sort the services by alphabetical order to make it easier to find. Double click on the Windows Defender service.
Step 8 (Optional): Under the General tab, look for the option labeled “Startup type.” Make sure this option is set to “Disabled.” This will prevent configuration errors or other issues from starting Windows Defender when you boot your PC, even after having manually shut it off.
Final Thoughts
Windows Defender is incredibly annoying, and can cause a lot of conflicts with other antivirus solutions. The good news is that it is pretty darn easy to see if it is still active, and simple enough to shut off completely. As a final warning, I would recommend checking to see if it is enabled if you aren’t currently using any antivirus.
Despite Microsoft’s best efforts, there are some viruses that can mess around with Windows Defender’s settings, and shut it off when you aren’t looking. If your computer was recently a victim of malware or a virus, I’d recommend verifying whether or not Windows Defender is still active. Doing so could save you the trouble of contracting another virus.